

Em comemoração a Primavera, receita grátis do nosso fofíssimo RhinoBee!!!

Rhinobee


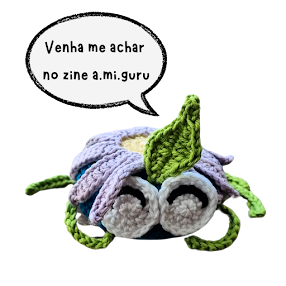
Oto, the Octopus

Oto, the octopus

Materiais


Porta copos Baby Yoda
Compartilhar momentos de amor, é o significado da vida.Grande beijo e um maravilhoso crochê pra você!

The Mandalorian coaster


ABBREVIATIONS
• ch – chain
• sc – single
crochet
• hdc – half
double crochet
• dc – double
crochet
•R1: round 1 or
row 1
•bb: back bumps
•sc: single
crochet
• inc – increase
• hdc-inc – half
double crochet increase
• invdec –
invisible decrease
•dec: decrease
• sl st – slip
stitch
• st/s – stitch/es
• (...) –
indicates stitch count changing colors
• (...) –
indicates stitch count at end of round
• [...] – repeat
the instructions in brackets
PATTERN
SHELL (make 2)
R1: 8 hdc in magic ring ( 4 green, 4 purple) (8)
Work in the third
loop only for the rest of the shell.
R2: [Hdc-inc] x8 (
8 green, 8 purple) (16)
R3: [Hdc, hdc-inc]
x8 ( 12 green, 12 purple) (24)
R4: Hdc, hdc-inc,
[2 hdc, hdc-inc] x7, hdc ( 16 green, 16 purple)
(32)
R5: [3 hdc,
hdc-inc] x8 ( 20 green, 20 purple) (40)
R6: 2 hdc,
hdc-inc, [4 hdc, hdc-inc] x7, 2 hdc ( 24
green, 24 purple) (48)
R7: [Hdc] x48 ( 24
green, 24 purple) (48)
Sc in next st, sl
st in next and fasten off invisibly.
Repeat for the 2nd
piece.
Stuff firm.
Sewing the 2 pieces together.
Fastening off.
Head
This piece starts at the bottom using green yarn.
R1: Ch 15. Star
ting in the 2nd bb f rom hook, 1inc, 12sc, 1inc. Rotate chain so
you' re working in
the bottom loops, 1inc, 12sc, 1inc (32)
R2: 1sc, 1inc,
13sc, 1inc, 1sc, 1inc, 13sc, 1inc (36)
R3: 1sc in each st
(36)
R4: 1dec, 16sc, 1dec, 16sc (34)
R5: 1dec, 15sc, 1dec, 15sc (32)
R6: 1dec, 14sc, 1dec, 14sc (30)
R7: 1dec, 13sc, 1dec, 13sc (28)
R8: 1dec, 12sc, 1dec, 12sc (26)
R9: 1dec, 11sc, 1dec, 11sc (24)
Switch to beige
R10: 1dec, 10sc,
1dec, 10sc (22)
R11: 1dec, 9sc, 1dec, 9sc (20)
R12: 1dec, 8sc, 1dec, 8sc (18)
R13: 1dec, 7sc, 1dec, 7sc (16)
R14: 1dec, 6sc, 1dec, 6sc (14)
R15: 1dec, 5sc, 1dec, 5sc (12)
R16: 1dec, 4sc, 1dec, 4sc (10)
R17: 1dec, 3sc, 1dec, 3sc (8)
R18: 1dec, 2sc, 1dec, 2sc (6)
Slst in next st
and fasten off. Then weave in ends with a tapestry needle.
Stuff firm.
sew the shell to
the head.
Antenna
6 ch
1 hdc in the 3nd ch from the hook
3 Slst in the
remaining ch
fasten off and sewing to the head.
R1: 8 sc
in a mr (8) – do not close the mr
R2: 1sc, 1 triple inc (16)
Slst in next st and fasten off
Insert the eye.
Sewing to de head
.png)
Pontos
Utilizados:
Anel Mágico = mg
Aumento = aum.;
Aumento Triplo = aumT.;
Correntinha = corr.;
Diminuição = dim.;
Meio Ponto Alto = mpa.;
Ponto Baixo = pb.
Casco (faça 2)
1ª carr.: 8 mpa no mg (4 verdes, 4
roxos)
A partir da segunda carreira
trabalhar os pontos na 3 volta do meio ponto alto.
2ª carr. aum em toda a volta . =
16 mpa (8 verdes, 8 roxos) (16)
3ª carr. 1 mpa, 1 aum (12 verdes, 12 roxos) (24)
4ª carr. 2 mpa, 1 aum (16 verdes, 16 roxos) (32)
5ª carr. 3 mpa, 1 aum (20 verdes, 20 roxos) (40)
6ª carr. 4 mpa, 1 aum (24 verdes, 24roxos) (48)
7ª carr. 48 mpa (24 verdes, 24 roxos) (48)
Finalize com ponto baixíssimo e arremate.
Coloque o
enchimento.
Costure as duas
peças.
Cabeça
Essa parte começa de baixo para cima. Comece com a cor
verde.
1ª carr. 15 correntinhas. Comece na segunda
correntinha a partir da agulha, 1 aum, 12 pb, 1 aum. Vire a peça
Trabalhe agora pegando as duas linhas do pb , 1 aum,
12pb , 1 aum (32)
2ª carr. 1 pb, 1 aum, 13 pb, 1 aum, 1 pb, 1aum,
13 pb, 1 aum (36)
3ª carr.: 1 pb em cada ponto (36)
4ª carr. 1 dim, 16 pb, 1 dim, 16 pb (34)
5ª carr. 1 dim, 15 pb, 1 dim, 15 pb (32)
6ª carr. 1 dim, 14 pb, 1 dim, 14 pb (30)
7ª carr. 1 dim, 13 pb, 1 dim, 13 pb (28)
8ª carr. 1 dim, 12 pb, 1 dim, 12 pb (26)
9ª carr.: 1 dim, 11 pb, 1 dim, 11 pb (24)
Troque para o bege
10ª carr.: 1 dim, 10 pb, 1 dim, 10 pb (22)
11ª carr.: 1 dim , 9 pb, 1 dim, 9 pb (20)
12ª carr.: 1 dim, 8 pb, 1 dim, 8 pb (18)
13ª carr.: 1dim, 7 pb, 1dim, 7pb (16)
14ª carr. 1 dim, 6 pb, 1dim, 6 pb (14)
15ª carr. 1 dim, 5 pb, 1dim, 5 pb (12)
16ª carr.: 1 dim, 4 pb, 1dim, 4 pb (10)
17ª carr.1 dim, 3 pb, 1dim, 3 pb (8)
18ª carr.: 1 dim, 2 pb, 1dim, 2 pb (6)
Finalize com ponto baixíssimo e arremate.
Coloque enchimento e costure a cabeça ao corpinho.
Antena
6 correntinhas
1
mpa na Terceira correntinha a partir da agulha
3 pbx nos pontos restantes
Arremate e
costure na cabeça
Olhos
Faça 2
1ª carr. 8 pb no anel mágico (8) – não
feche o anel mágico
2ª carr. 1pb , 1 aumT - em
toda a volta (16)
Finalize com ponto baixíssimo e arremate.
Coloque
os olhos tamanho 8
Costure na cabeça
Borde
a boca com um sorriso largo 😊
This is me

A.Mi.Guru
Creative crochet studio
🌈Crio objetos mágicos feitos de crochê
💡 Te ajudo com ideias para tecer
📚 Faço livros ilustrados com amigurumi
👀 Espia só
🔊 Pedidos personalizados entre em contato
Follow Us
recent posts
